Guideline-NX interoperability #1: OPEN .PRT
This is the quickest way (and probably most fitting the common product development needs) to insert FCS seats into a NX part.
Starting point can be the .prt file or its exported .bly file
IMPORTANT: either procedure you decide to follow, pre-requisite for FCS seats transfer to .prt file is that that file will stay to its original location into the file system. In fact, .bly file contains the .prt path recorded, which will be used by Guideline 4.0 to create the features needed within the right NX part
Procedure starting from .prt
Guideline 4.0 has the capability to open .prt file directly, given that Siemens NX is installed and available (for more details, see Guideline 4.0 Installation Guide).
Depending specific design process, .prt file may also contain raw block and Guideline 4.0 has the capability to manage it.
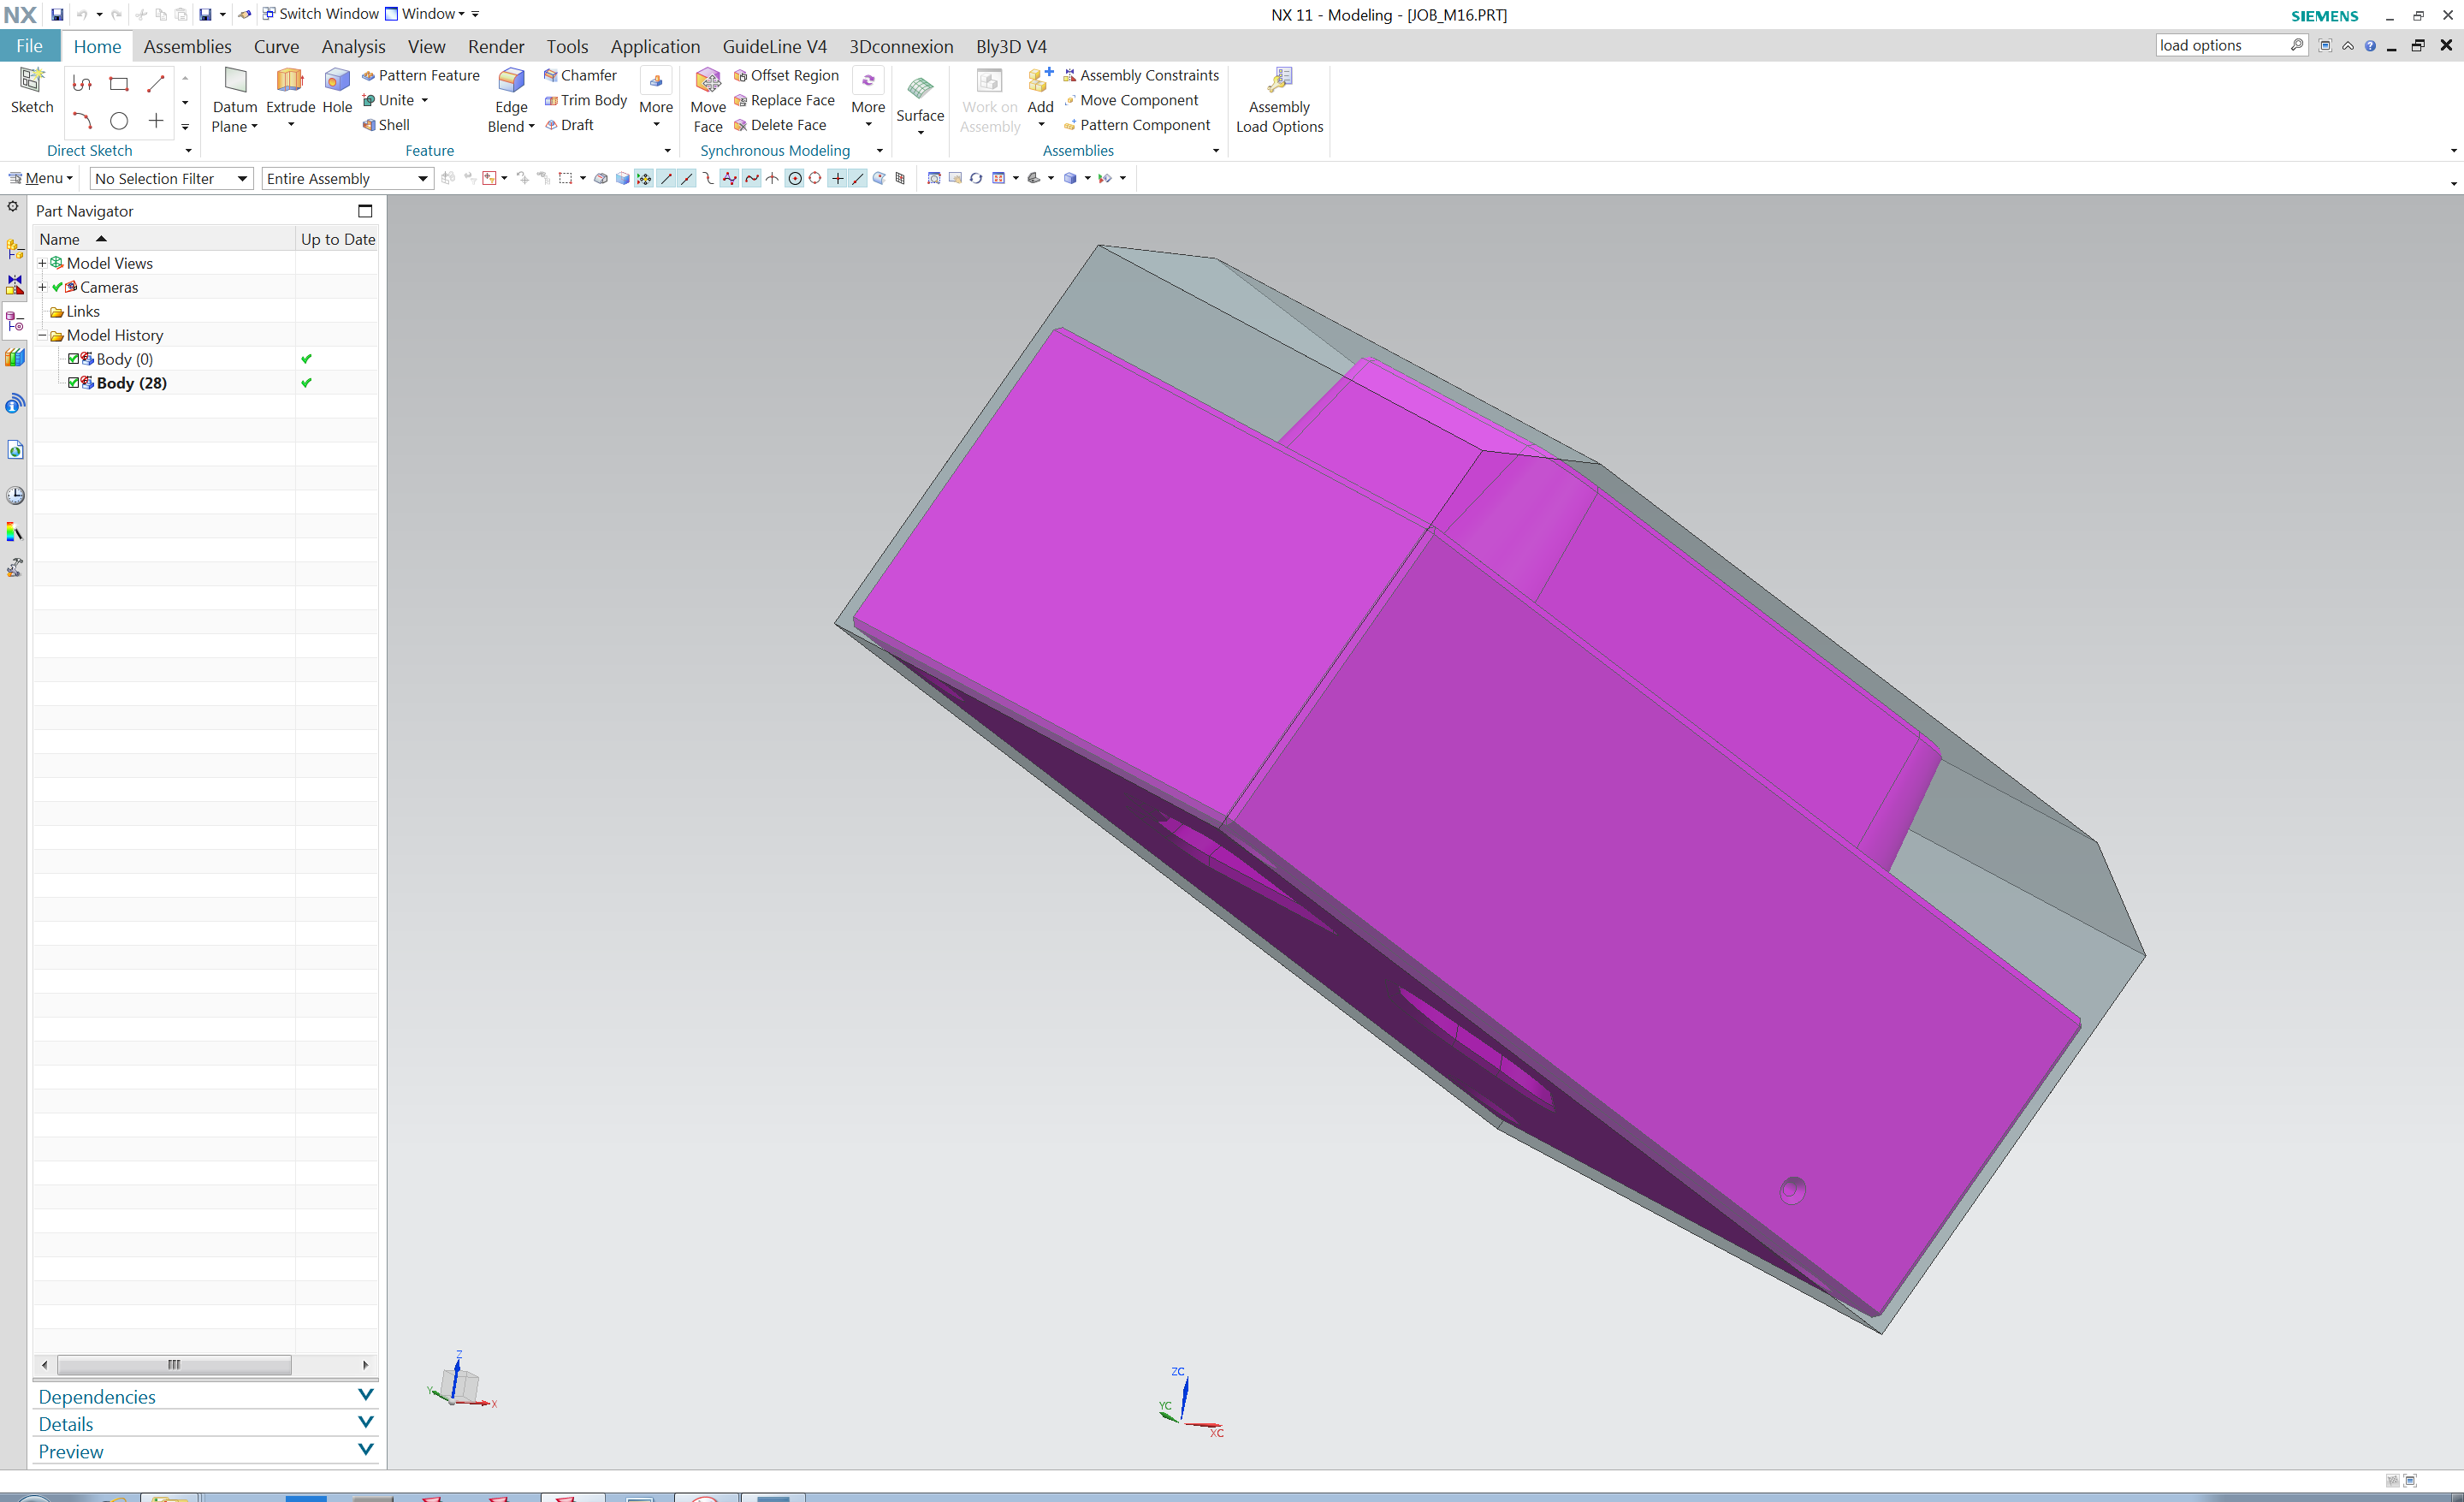
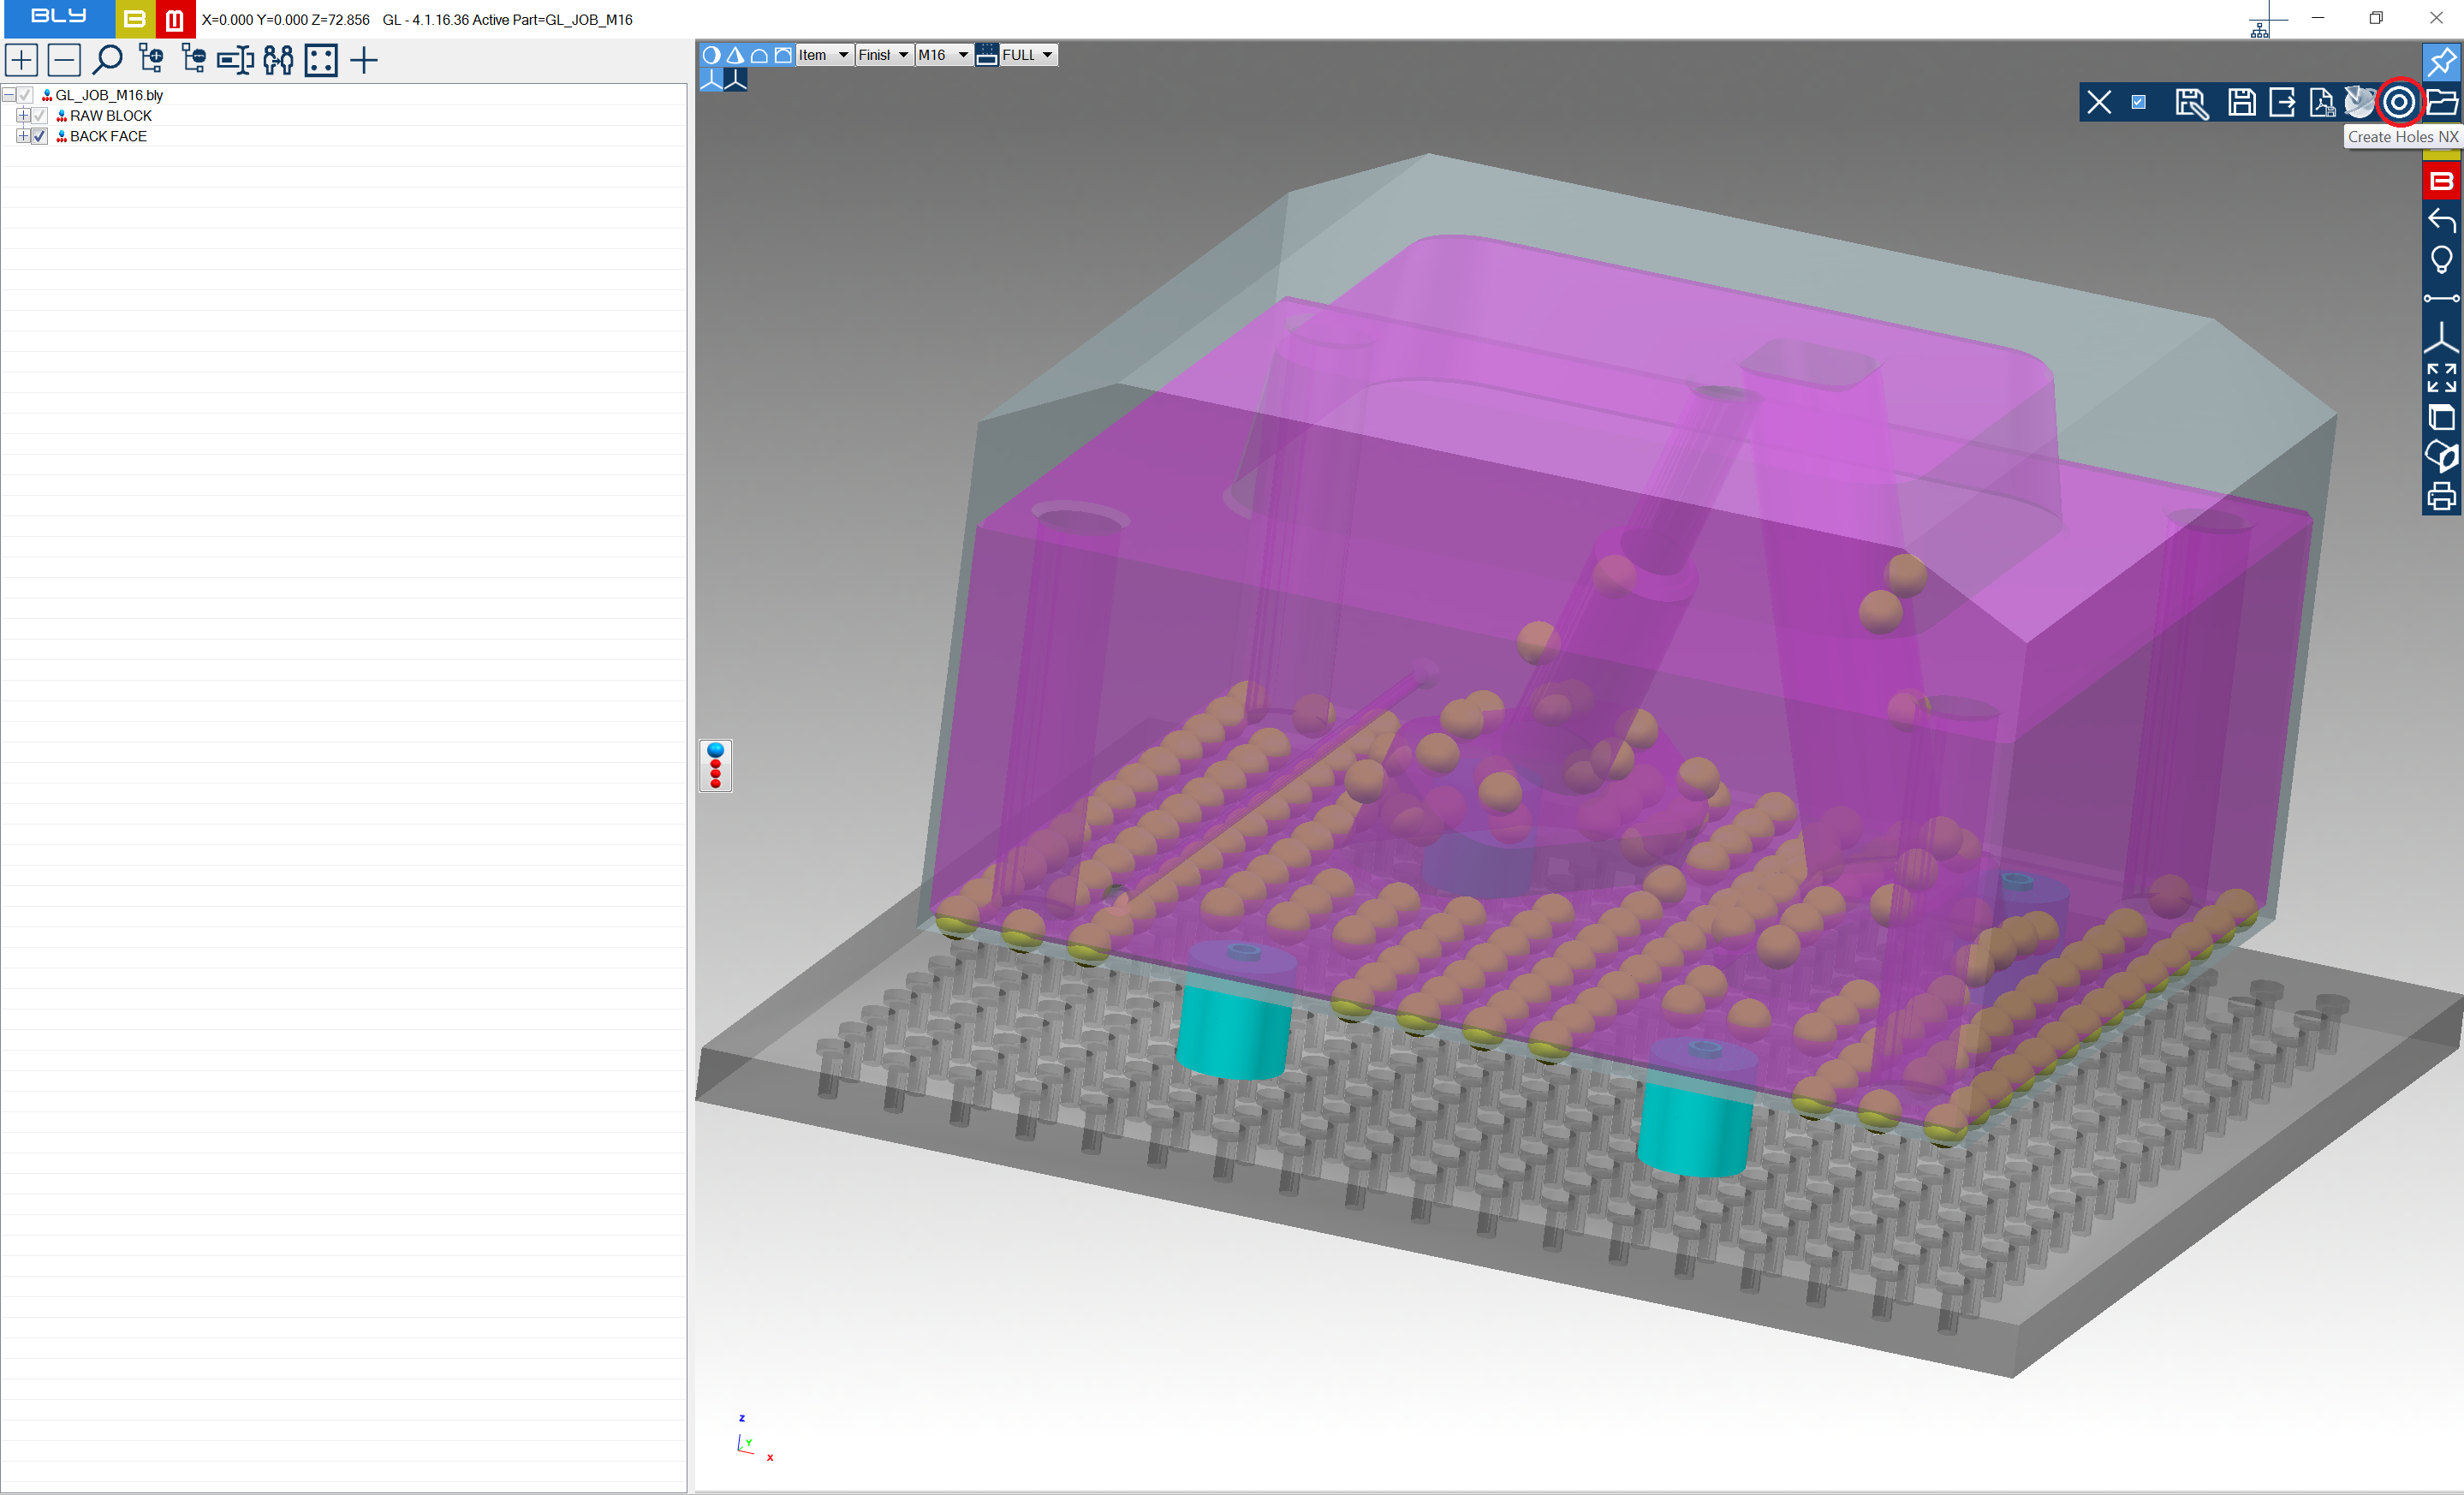
In our example, the .prt file contains both the workpiece and its raw block, having a specific orientation as show in the picture below:
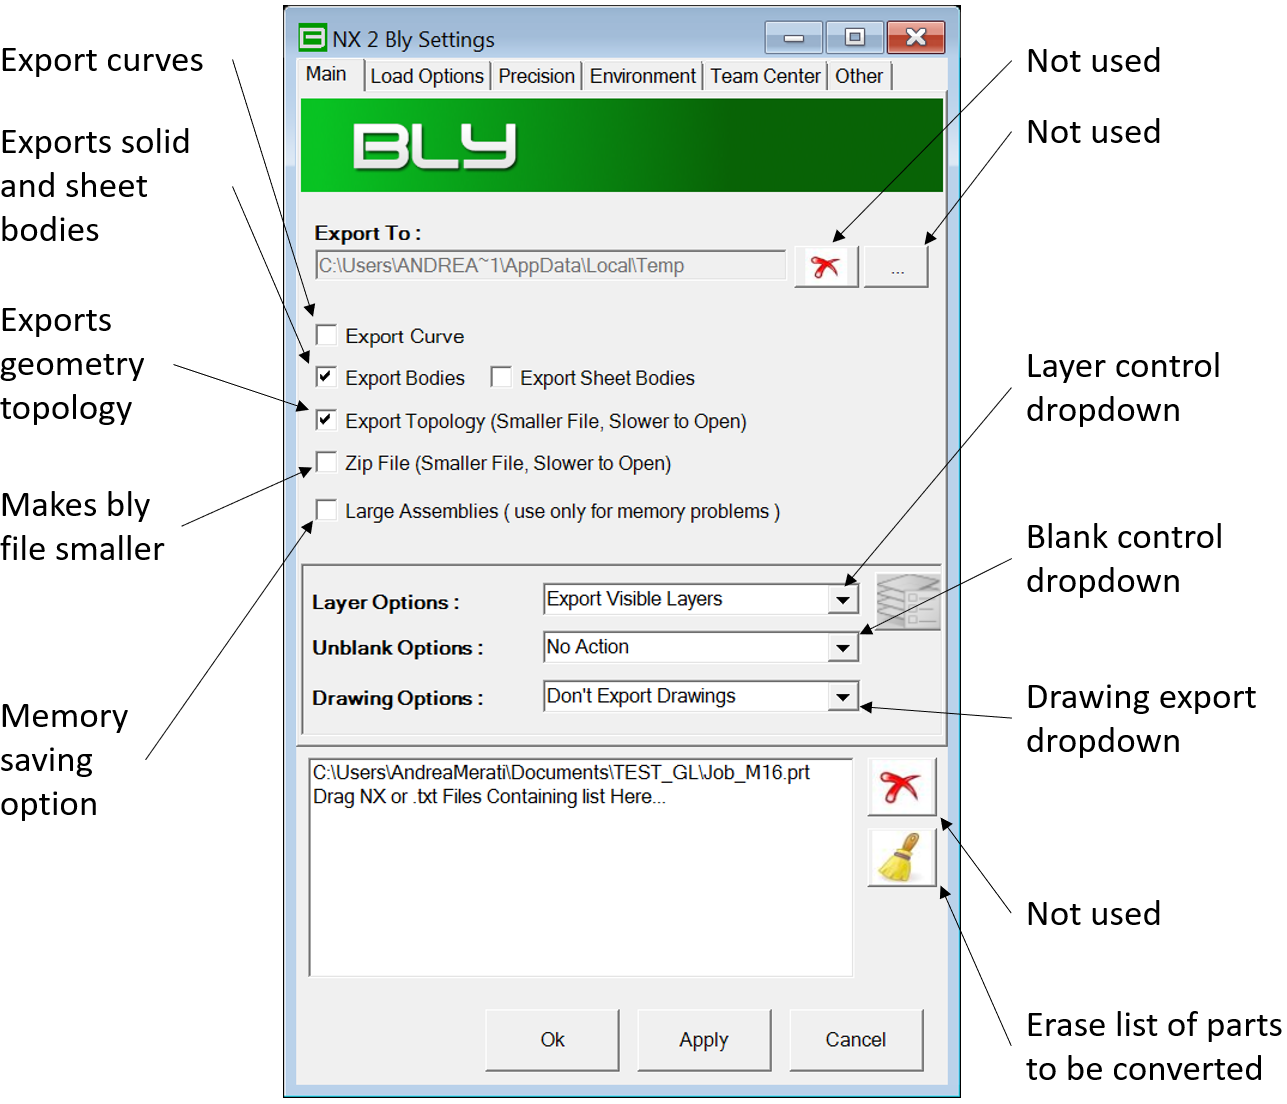
When opening a .prt file in Guideline 4.0, the following window to control the translation displays:
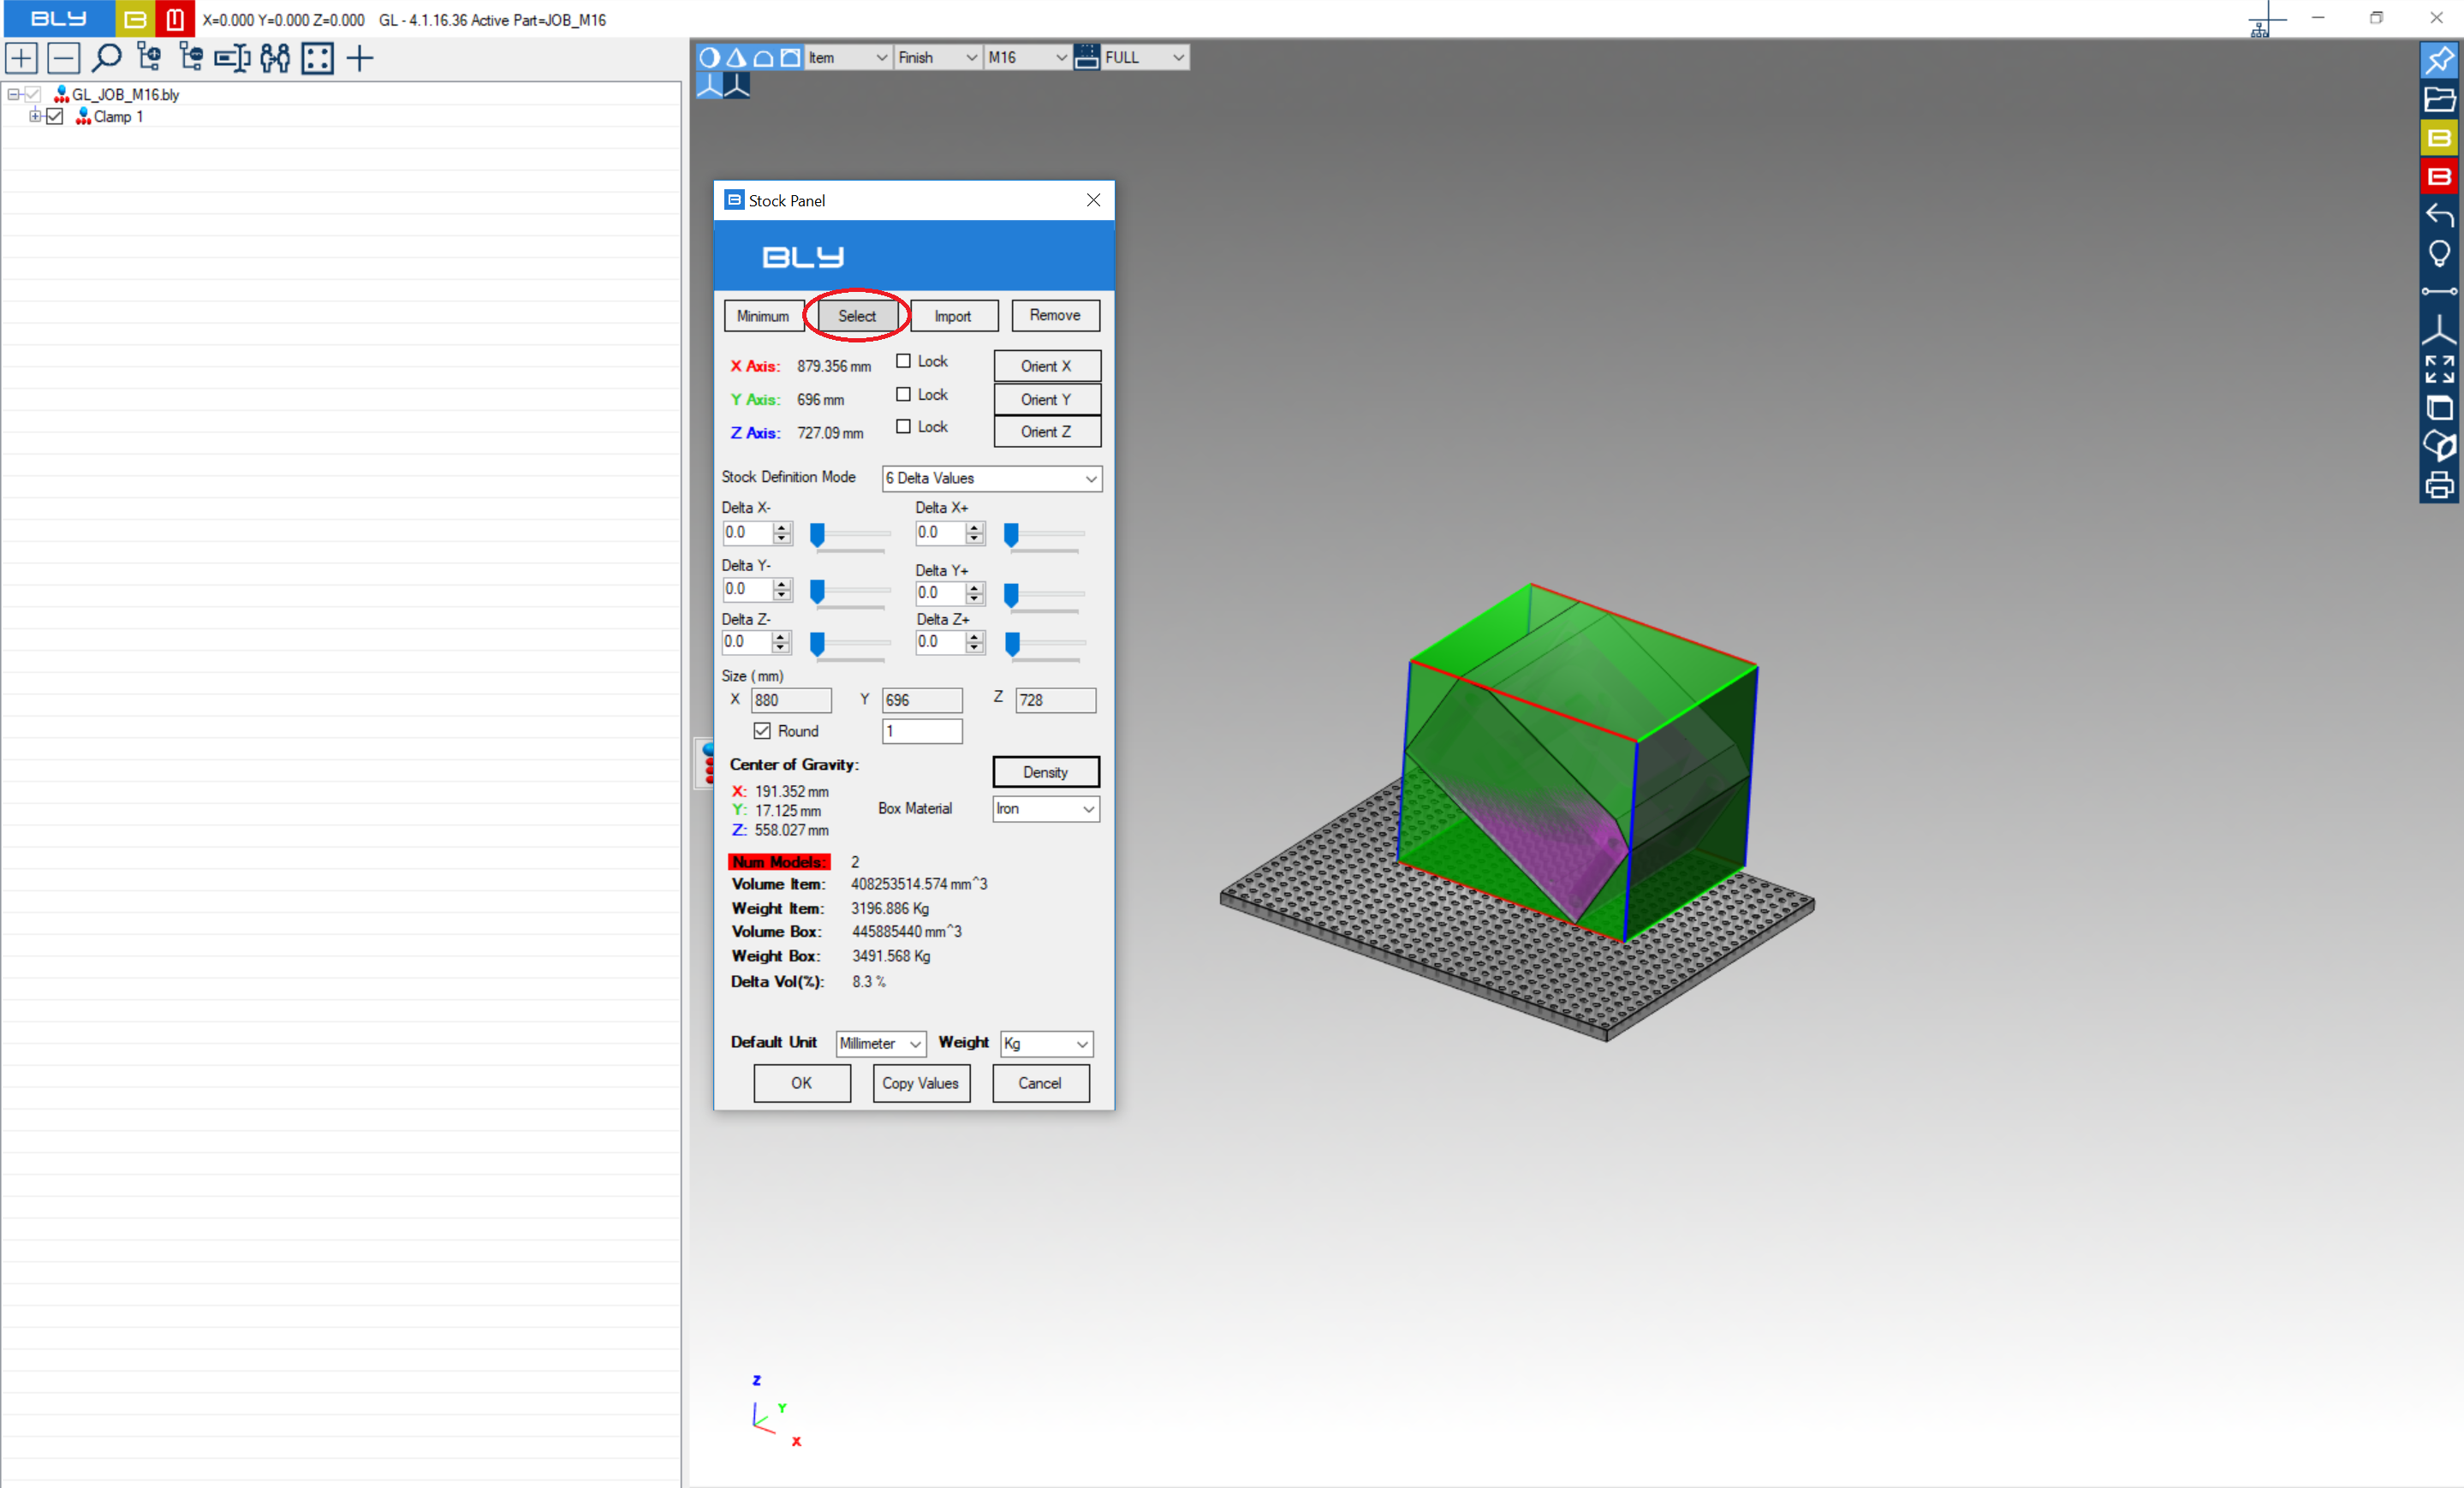
Once finished, the resulting 3D is a normal .bly workpiece and can be clamped as usual:

In our example, the .prt has both workpiece and raw block, so raw block can be selected in Guideline 4.0:
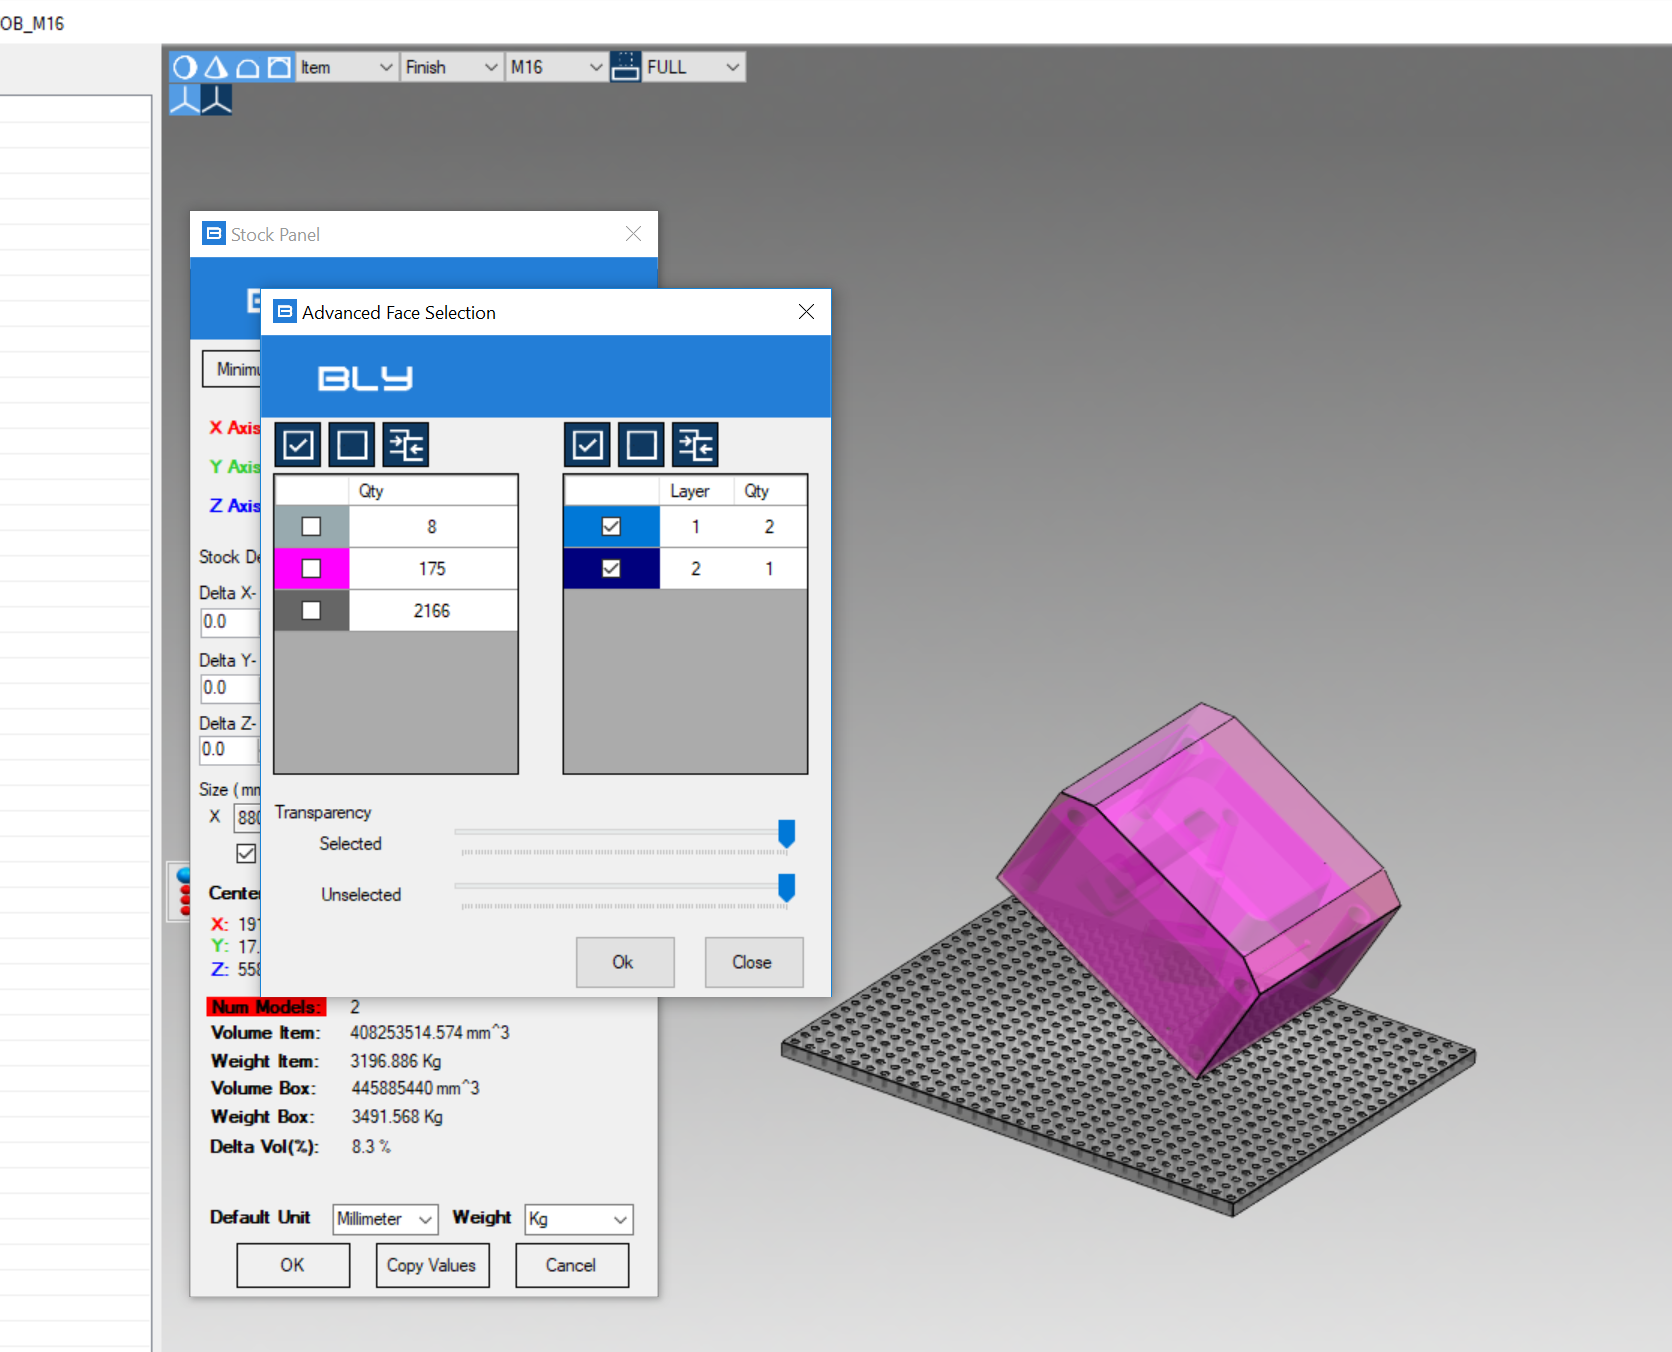
Selection can be done using Advanced Face Selection, similarly as explained in chapter Advanced Selection: this function is particularly useful in case of raw blocks made in of surfaces rather than solid
After the clamps completion, seats can then be transferred into .prt file: press Create Holes NX into Open File toolbar
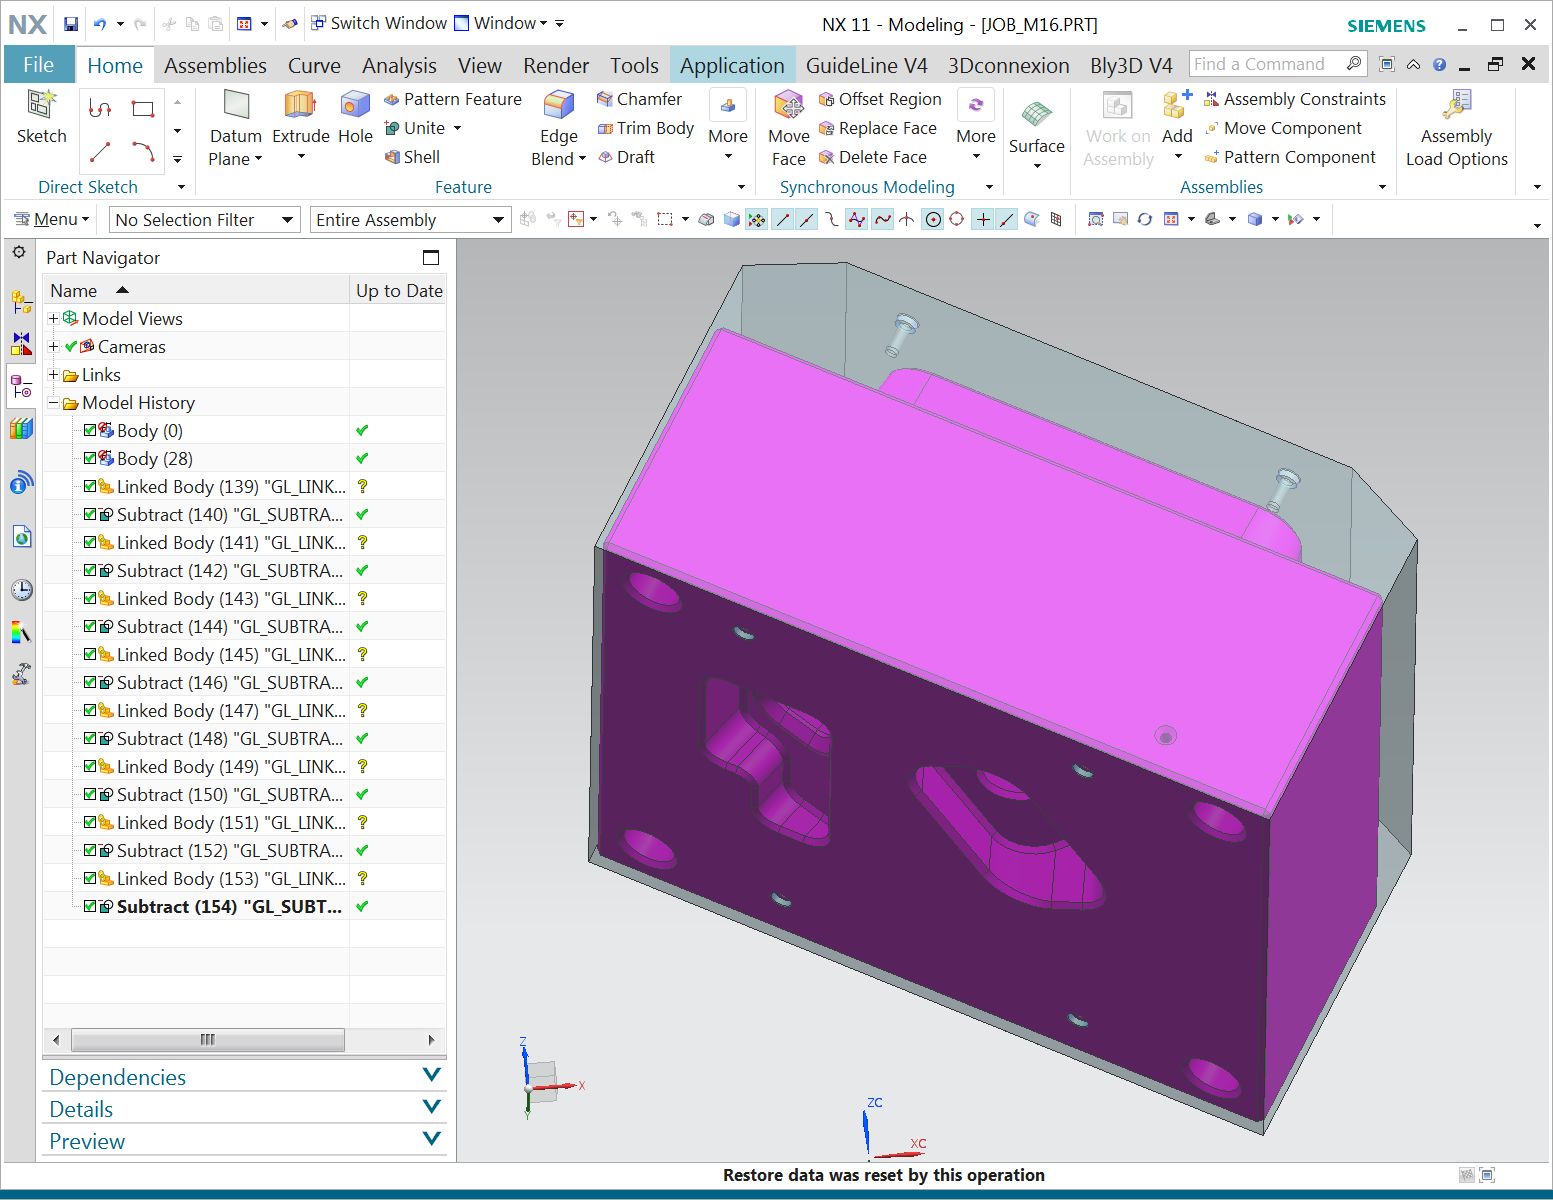
After completion, NX part will list additional features for FCS seats:
Saving at any stage will create a .bly file, by default named as the .prt file into same directory: that file can be reopen anytime in case of revision need.
In case of modifications needed, procedure can be followed either form .prt opening or simply opening .bly file, modify the clamp and "Create NX Holes".
See also this video.